
How to Draw Jack O Lamp Drawing
Jack O Lamp Drawing
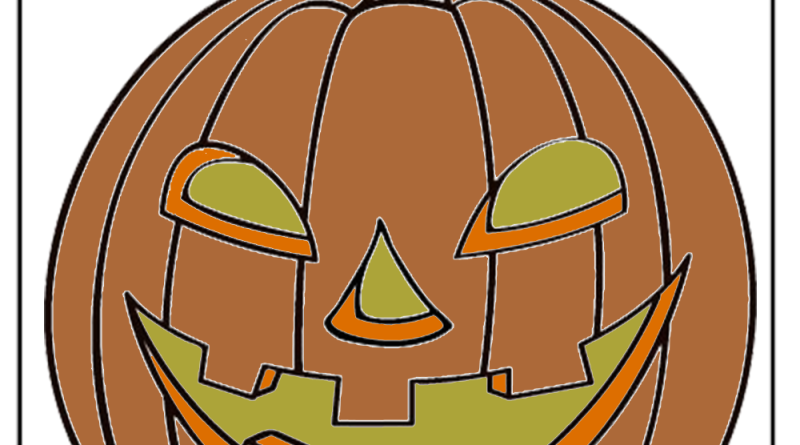
Figure out how to draw an extraordinary-looking Jack O Lamp Drawing with simple, bit-by-bit drawing directions and video instructional exercises. Following the basic advances, you can draw a lovely Jack O Lamp without much stretch. What is a jack o’ light? This alarming or entertaining confronted cut pumpkin is many times found in the fall. Genuine or plastic forms decorate entryway patios, workplaces, stores, and different spots.
Visit the Santa Claus Drawing Tutorial on the soft roots website.
Jack o’lantern characters should be visible in kid’s shows like It’s the Incomparable Pumpkin, Charlie Brown. However, why did individuals begin cutting appearances on vegetables in any case? This exceptionally old practice began in Ireland. There, potatoes or turnips, as opposed to pumpkins, were utilized. The terrifying appearances were remembered to drive away detestable spirits. Irish migrants carried the custom to America, where local pumpkins were promptly accessible. From that point, the especially spread worldwide as the occasion turned out to be more business.
What might be said about the name jack o’lantern?
It was gotten from the Irish legend of “Miserly Jack” or “Jack of the Light,” who welcomed Satan to drink with him. He would have rather not paid, and Satan turned into a coin to take care of the bill. Jack stashed the coin with a silver cross, keeping the soul from changing to his unique structure. Afterward, he fooled Satan into climbing a tree, on which he cut a cross, so he could not descend. Each time he liberated him, he made him guarantee that he wouldn’t annoy him, even in eternity.
When Jack passed on, neither paradise nor the hidden world would take him, so he wandered the earth conveying a light produced using a turnip. You want to figure out how to draw an unnerving or hilarious animation jack o’lantern. This basic, bit-by-bit Halloween animation-attracting instructional exercise is here to show you how.
What will you want?
Just a pencil, an eraser, and a piece of paper. You may likewise need to vary your image in shades of orange, yellow, white, or green. If you prefer this instructional exercise, see the accompanying drawing guides: Sugar Skull, Skull, and Skeleton.
Jack O Lamp for Youngsters – Stage 1
Start by drawing a huge oval. This starts the front of the pumpkin and structures the focal rib or segment of the squash.
Simple Jack O Lamp Drawing – Stage 2
Define a bent boundary on each oval side to frame two halfway oval shapes. This framework has more ribs, finishing the diagram of the organic product.
Simple Jack O Lamp Drawing – Stage 3
Draw a little oval over the pumpkin. This will shape the tip of the stem.
Simple Jack O Light Drawing – Stage 4
Define bent boundaries from the highest point of the pumpkin to the little oval framing the stem.
Simple Jack O Light Drawing – Stage 5
Draw a leaf at the foundation of the stem. Utilize two bent lines that meet at a point over the pumpkin.
Simple Jack O Lamp Drawing – Stage 6
Draw the cut-out eyes, deleting as the need might arise. Attract a huge circle to shape each eye.
Simple Jack O Lamp Drawing – Stage 7
Draw a more modest circle covering every one of the first. Delete the covering lines as the need should arise.
Simple Jack O Lamp Drawing – Stage 8
Delete half of each eye’s more modest circle. This finishes the diagram of the cut-out eyes, causing it to give the idea that they have round understudies. Attract a triangle to the center of the pumpkin utilizing three bent lines. This structures the cut-out nose of the jack o’lantern.
Simple Jack O Light Drawing – Stage 9
Draw the jack lanterns wide, grinning mouth. Utilize two long bent lines that meet at sharp focuses on each end. Delete the covering lines as the need might arise.
Simple Jack O Light Drawing – Stage 10
Draw three-sided teeth at the highest point of the mouth. For every tooth, encase the shape utilizing two bent lines that meet at a descending point.
Simple Jack O Light Drawing – Stage 11
Give the cut-out eyes, nose, and mouth a three-layered appearance. Define a bent boundary generally lined up with the eyes’ external edges, the nose’s foundation, and the mouth’s lower part. This diagrams the inward shell of the pumpkin.
Simple Jack O Light Drawing – Stage 12
Add additional subtleties to the jack-o’lantern. Define bent boundaries underneath the eyes and sets of straight lines along the lower “lip” of the mouth. Define a bent boundary for the focal leaf vein, with more limited bent lines stretching from it. Surface the stem with bent lines of various lengths. At last, draw the twisting state of a ringlet of a pumpkin plant utilizing bent lines that meet at a sharp point.
Simple Jack O Lamp Drawing – Stage 13
Why not take a shot at drawing other pumpkin faces? To begin with, complete Stages 1 through 5 to frame the pumpkin. Then, at that point, give these mouths and eyes a shot. You can utilize crisscross lines to make a wise-looking mouth or draw a grinning mouth with level teeth for a customary look. You might grimace by flipping around that grin! For eyes, you can draw grimacing temples over round spheres, make “C” molded grinning eyes, or use sets of bent lines that meet at sharp focuses on each finish to draw underhanded, squinting eyes.
Simple Jack O Lamp Drawing – Stage 14
Variety your pumpkin (or pumpkins). This fall vegetable is generally orange, green, or white. A flame or light inside gives the face a yellow shine. Yet, for Halloween, pumpkins can be painted in any tone!
Also Read Businessegy